Chapter 2: How to use ASF1-30
This chapter describes how to use ASF1-30.
2.1 Media Preparation
Usable media
The following media is available for ASF1-30.
• Sheet media for laser printers (thickness 0.15 to 0.23 mm)

The maximum number of media that can be loaded is 150 sheets, or the maximum stacking height is up to 30 mm.
The following media sizes are available for the ASF1-30:
• A3 Plus (329 x 483 mm)
• A3
• A4
• Letter
Media sizes other than those listed above can also be loaded, but the positions of the media guides and push rollers are not covered by the warranty.

• When using ASF1-30, the cutting mat cannot be used.
• If the media is charged with static electricity, the media feeding noise may become louder or the media may not be feed properly. Please fan the media well before loading it.
Media that easily becomes charged during the printing process can cause media feeding problems.
• If the edges of the media are not neatly aligned, the registration marks may not be scanned.
Make sure to neatly align the edges of the media before loading it.
• If you are using curled media, roll it in the opposite direction to flatten it before loading it.
• Depending on the type of printer or media, curling may occur when printing.
In this case, please print by manually feeding one sheet at a time.
• Always load media vertically.
Do not mix media of different materials or sizes.
• The maximum number of media that can be loaded is 150 sheets, or the maximum stacking height is up to 30 mm.
• Media repeatedly absorbs and releases moisture depending on the humidity. Moisture absorption can cause the media to curl and become dusty, so when not in use, return it to the package and store it away from high temperatures, high humidity and direct sunlight.
• Do not use media that has been surface treated for inkjet printing on both sides.
Dirt may accumulate on the rollers, causing problems with media feed.
Clean the rollers if they become dirty.
Unusable Media
The following media is not available for ASF1-30.
• Folded/curled/creased media
• Wet Media
• Too thin media (thickness less than 0.15 mm)
• Too thick media (thickness 0.23 mm or more)
• Media prone to static electricity
• Media with sticky surface
• Perforated media
• Media with glitter on the surface
• Pre-cut media
• Soft, tension-free media
Ex.: Examples of media with bulge or curl

2.2 Loading the Media
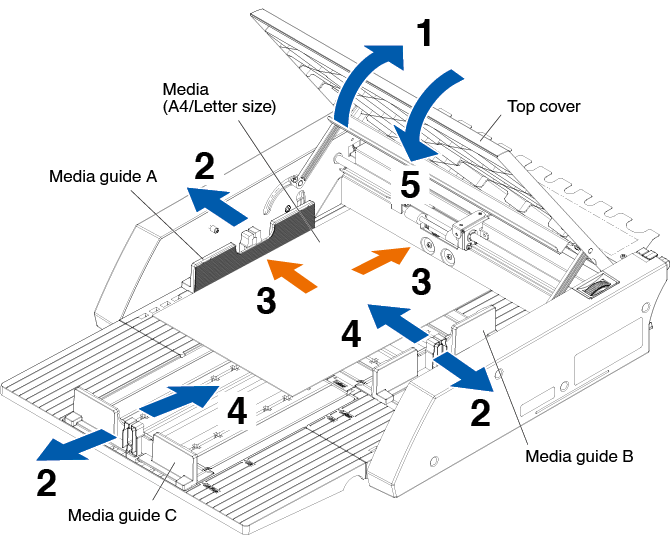
Procedure for loading A4 size or letter size media
1. Open the top cover.
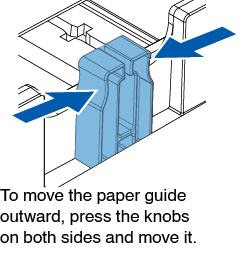
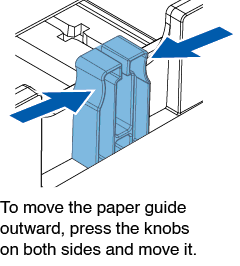
2. Move media guides A, B and C in the directions indicated by the blue arrows.
Move media guide A all the way to the edge.
3. Align the media with paper guide A and load it firmly until it hits the back.
Please fan the media well before loading it.
4. Adjust paper guides B and C to fit the media.
5. Close the top cover.
If there is a gap between the media guides and the media, the media is fed at an angle, which may result in poor cutting.
Set each media guide by pressing it against the media.
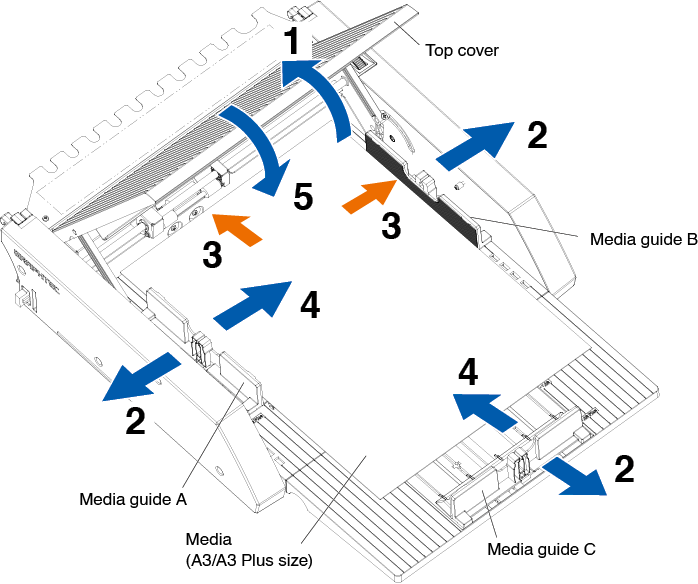
Procedure for loading A3 size or A3 Plus size media
1. Open the top cover.
2. Move media guides A, B and C in the directions indicated by the blue arrows.
Move media guide B all the way to the edge.
3. Align the media with paper guide B and load it firmly until it hits the back.
Please fan the media well before loading it.
4. Adjust paper guides A and C to fit the media.
5. Close the top cover.
If there is a gap between the media guides and the media, the media is fed at an angle, which may result in poor cutting.
Set each media guide by pressing it against the media.
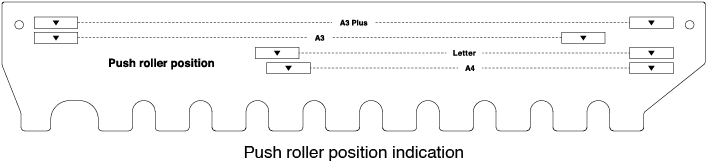
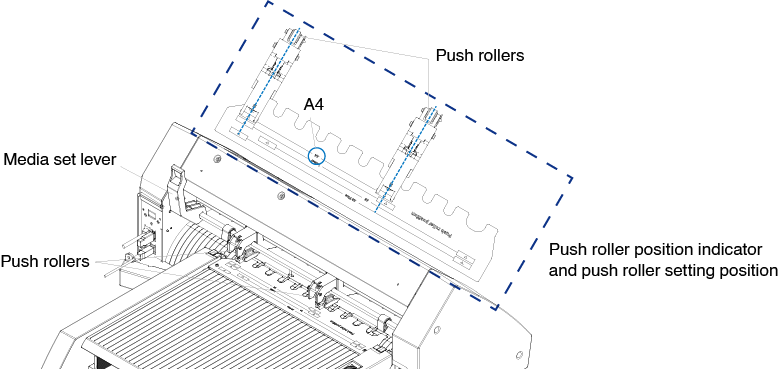
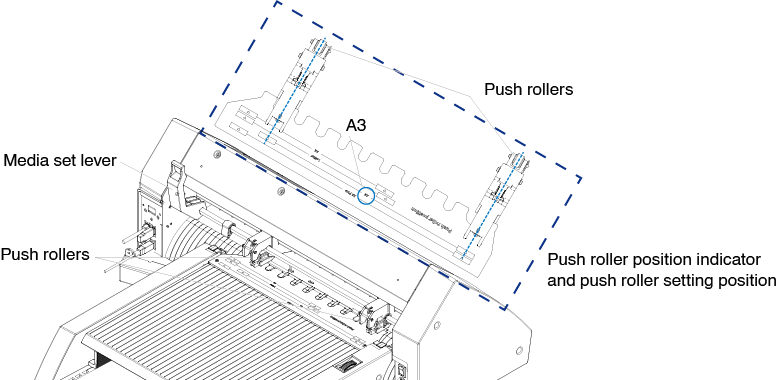
2.3 CE8000-40 Push Roller Position Adjustment
Lower the media set lever of the CE8000-40 and adjust the push roller position of the CE8000-40 to fit the push roller position indication of the ASF1-30.
For how to operate the media set lever and adjust the position of the push rollers for the CE8000-40, refer to the CE8000 Series User’s Manual.
When push roller position is A4
When push roller position is A3
2.4 Detailed position adjustment of CE8000-40 push roller
If the media is fed at an angle due to softness or other factors, and the registration marks cannot be scanned, adjust the position of the push rollers according to the following steps.
• For the ASF1-30, a registration mark size of 15 mm or more is recommended.
• For instructions on how to operate the media set lever and how to adjust the position of the push rollers for the CE8000-40, refer to the CE8000 Series User’s Manual.
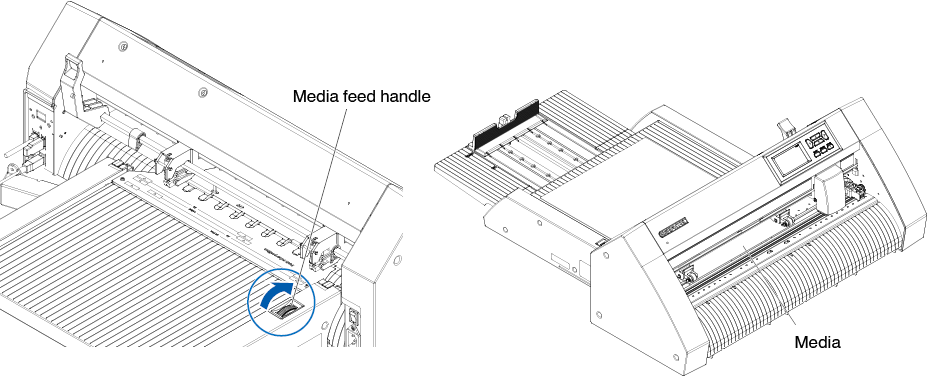
1. With the media set lever of the CE8000-40 lowered, turn the media feed handle of the ASF1-30 in the direction of the arrow to feed the media to the CE8000-40.
• Feed the media until it is under the push rollers.
If the media is fed too far in, it is fed at an angle and you are not able to adjust the position of the push rollers correctly.
• The media feed handle only turns in this direction.
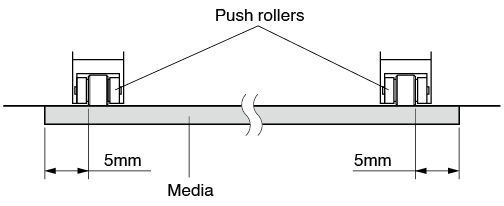
2. Adjust the position of the push roller so that the distance between the edge of the media and the edge of the push roller is 5 mm.
3. After adjusting the position of the push roller, turn the media feed handle to eject the media.
In addition to feeding media using the media feed handle, you can also use the media feeding and ejecting functions to load, eject, and adjust media.
For details, see “3.1 CE8000-40 Specifications” – “LOAD/EJECT in QUICK MENU”.
2.5 Removing the ASF1-30
Make sure that the power switch of the CE8000-40 is turned off (to the “ ” side).
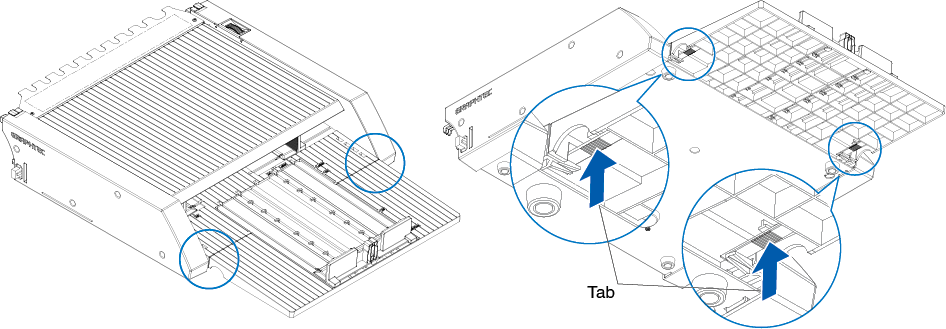
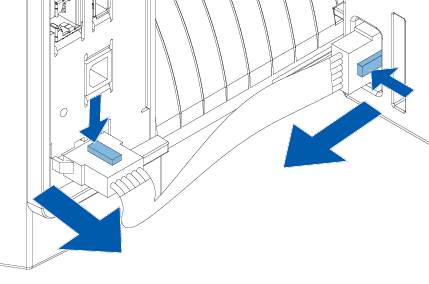
1. Press the tab on the extension tray to unlock it, then pull out the extension tray.
Be sure to unlock the tab before pulling it out. Using excessive force may cause damage.
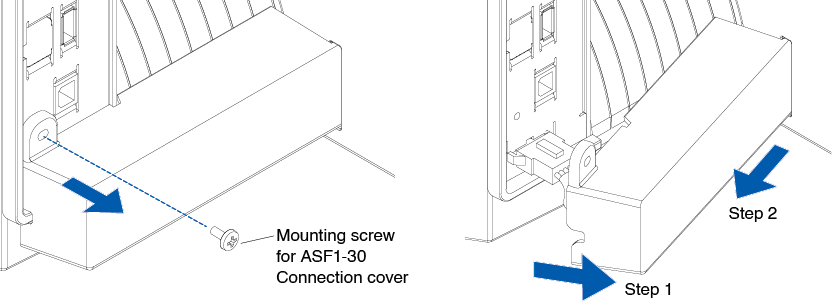
2. Remove the cable cover.
Remove the mounting screws for the ASF1-30 connection cover and remove the cable cover.
3. Remove the connecting cable.
Be sure to unlock the connector before pulling it out. Pulling it out forcefully may cause damage.
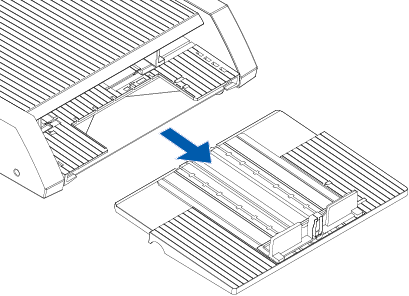
4. Raise the ASF1-30 fixing hook, and then remove the ASF1-30 toward the rear.

5. Use a Phillips screwdriver to install the ASF1-30 connection cover.
