Chapter 4: Convenient Functions
This chapter describes about the convenient functions of the plotter.
4.1 Settings for Cutting
Settings such as area and width of cutting, page length, mirrored, enlarged, shrunk, etc., can be set.
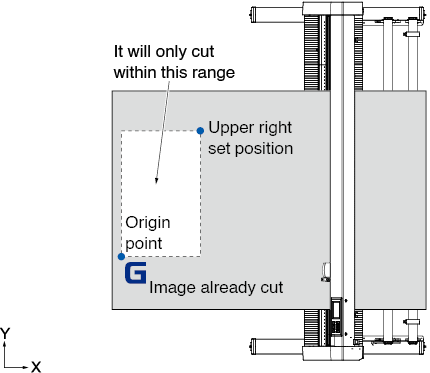
Setting cutting area
Origin point will be set at lower left of the AREA once the AREA is set.
It is possible to set the origin point at the center when the HP-GL is selected.
Move the origin point to change the cutting position.

See “3.3 Setting the Origin Point “ for the moving the origin point, and origin point using the HP-GL command.
Operation
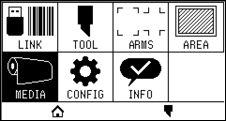
1. Press the [ ] icon.
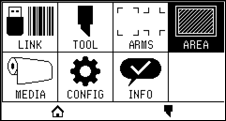
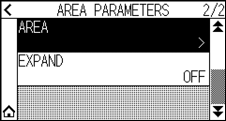
2. Press the [AREA].
3. Press the [ ] icon.
4. Press the [AREA].
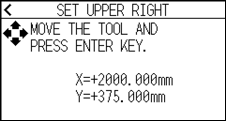
5. Press the [TOOL MOVE].
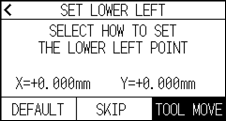
• Coordinate value displayed here is the distance to the tool carriage from the origin point.
• Press [DEFAULT] if the cutting area is not to change.
6. Press the POSITION ( ,
,  ,
,  ,
,  ) keys and move the tool carriage to the position to be the lower left of the cutting AREA.
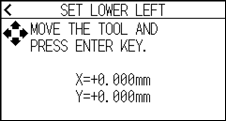
7. Press the [ENTER] key once the tool carriage is in correct position.
8. Press the [TOOL MOVE].
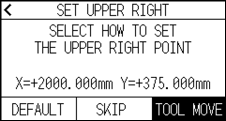
9. Press the POSITION (, , , ) keys and move the tool carriage to the upper right position of the cutting area.
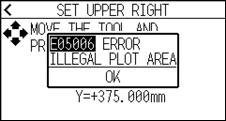
Please set the X and Y cut range for the areas on the upper right and lower left points to at least 10 mm.
An error message will appear for areas that are too small.
You will need to reset the settings for the upper right and lower left points.
10. Press the [ENTER] key once the tool carriage is in correct position.
11. Press the [ ] icon.
 It will return to HOME screen.
Setting cutting width (EXPAND)
Set the width of the cutting area.
Default setting is to the internal edge of the push rollers.
It can be set up to 10 mm outside (positive value).
Setting will affect both ends, resulting the total width change will be double the set value.

Do not set the “INITIAL B. ANGLE POSITION” of the tool setting to “Y OUTSIDE” when the setting value is set to more than 8 mm. The blade might be damaged by moving the carriage outside the media under this condition.
• If the value is set, it is able to cut over where the push rollers are, but the push rollers passes where it is cut, creating a chance of bad feeding depending on the media.
• Set the width of cutting area, and then send the cutting data to the plotter.
Cutting data in the buffer memory will be cleared when cutting area width is changed.
Operation
1. Press the [] icon.
2. Press the [AREA] key.
3. Press the [] icon.
4. Press the [EXPAND].
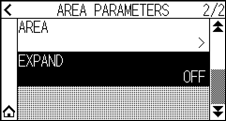
5. Specify the setting value using the [] [ ] icon or the [
 ] icon.
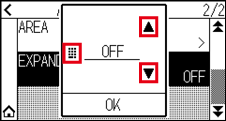
• If the settings value is set to other than OFF (0.0 mm), transfer direction of the cutting area will also expand 5 mm forward.
• You can set the range between 1.0 mm and 10.0 mm, or OFF (0.0 mm).
6. Confirm the setting and press the [OK].
7. Press the [] icon.
It will return to HOME screen.
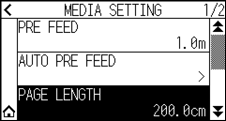
Setting length of the page
Set the length of one page when using roll media.
If the cut data is longer than the set page length, only the part that fits within the set page length will be cut, and the part that exceeds it will not be cut.
• Default setting for page length is 2 m for CE8000-40, and 5 m for CE8000-60/130.
Check the setting of the page length when cutting long length.
* Please be sure to use the basket (option) when cutting something over 2 m for CE8000-60/CE8000-130.
• Page ejection quality assurance goes up to 2 m for the CE8000-40 and up to 5m for the CE8000-60/130.
(It depends on the media specified by Graphtec and setting conditions.)
– Use the basket (option).
– Use 3M Scotchcal Series 7725.
– Set the speed below 30 and the acceleration below 2.
– Perform pre feed for the amount to be used before cutting.
– Leave the media in environment to use for adequate time if the deviation of temperature and humidity is big.
– Set the both push rollers at least 15mm inside the edge of media.
• Set the sideway tension of the media uniform when setting the media when cutting long length.
Media might come off the rollers while cutting if it is not uniform.
• Pull out the amount to use before cutting when you are using the roll media.
• To reduce the shifting of the media, perform the pre feed to the full length to be cut.
(see “Pre Feed of Media (Paper or Marking Film)”)
Also, pre feeding can be done automatically when the data is received.
(See “Perform Automatic Pre Feed When Cut Data is Received”).
* Pre feeding will stabilize the feed by acclimating the media, taking out the slack.
• This setting will be saved even if the power is shut off.
Operation
1. Press the [] icon.
2. Press the [MEDIA].
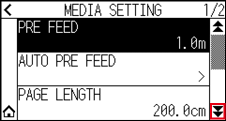
3. Press the [PAGE LENGTH].
4. Specify the setting value using the [] [] icon or the [] icon.
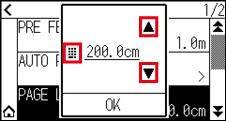
You can set the range between 20.0 cm and 5000.0 cm.
5. Confirm the setting and press the [OK].
6. Press the [] icon.
It will return to HOME screen.
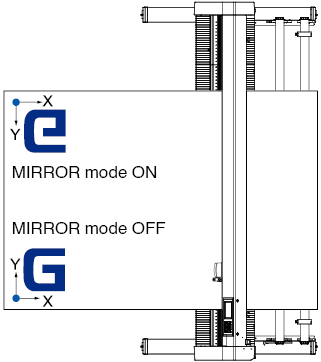
Setting mirror
You can cut by reversing the cutting origin position and coordinate axes.
This setting will be saved even if the power is shut off.
Operation
1. Press the [] icon.
2. Press the [AREA] key.
3. Press [MIRROR] to turn it to [ON].
To cancel, set it to [OFF].
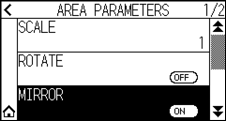
4. Check the settings and press the [] icon.
It will return to HOME screen.
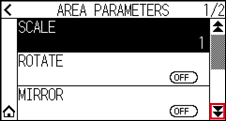
Set the enlarge/shrink scale (Scale)
It can enlarge or shrink cutting.
This setting will be saved even if the power is shut off.
Operation
1. Press the [] icon.
2. Press the [AREA] key.
3. Press the [SCALE].
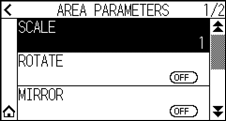
4. Display the scale to be used using the [] and [ ] icons.
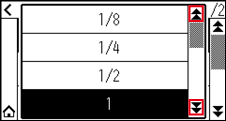
Values that can be set are 1/8, 1/4, 1/2, 1, 2, 3, 4, 5, 6, 7 and 8.
5. Press the scale you want to use.
6. Press the [] icon.
It will return to HOME screen.
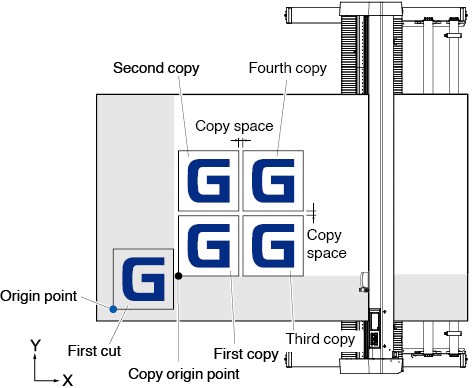
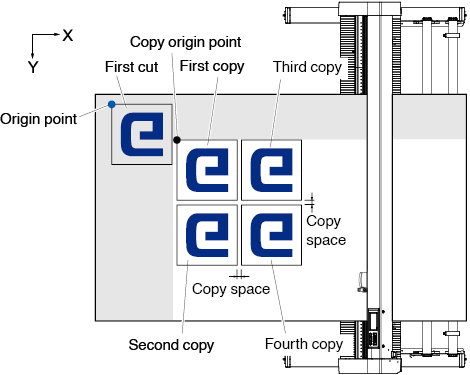
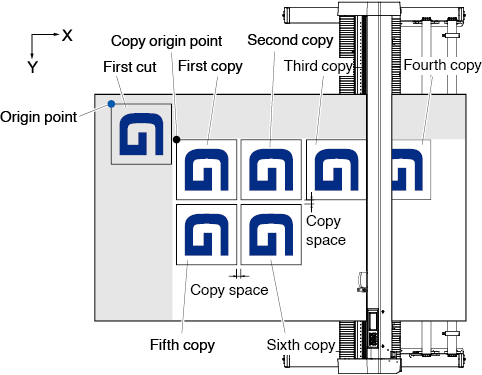
4.2 Copy (Duplicate Cutting)
Repeats cutting the specified number of times using the cutting data held in the buffer memory.
• Do not send new data to plotter while copying. Cutting data in the buffer memory will be cleared.
• Previous cutting data will be cleared and newly sent data will be stored as cutting data if you send new data with 10 seconds or more interval from the time it finished cutting.
• It can not copy if data is more than 1.6 MB because it cannot be stored in the buffer memory of the plotter.
• Buffer memory that can be used for copy will decrease if you turn on the data sort.
Turn off the data sort when you need to copy cutting with large data.
See “8.1 Sorting the Cutting/Plotting Data” for data sort.
• If the original cutting data to be copied starts away from the origin point, copied cutting will also start away from the origin point.
To Avoid wasted space, create the cutting data close to the origin point.
• When copying using a roll paper barcode, be sure to scan the bar code on the leading edge.
When media change mode is OFF
Copy is performed in following order.
Copying when setting MIRROR is performed in the following order.
Copying when setting COORDINATE AXES ROTATION is performed in the following order.
Operation
1. Plot (cut) the data you want to copy once.
Cutting data is stored in the buffer memory.
2. Press the POSITION (, , , ) keys and move the tool carriage to the position to copy.
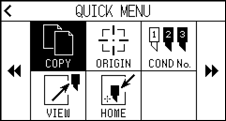
3. Press the [ ] icon.
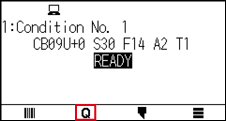
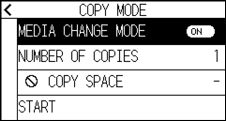
4. Press the [COPY].
• “NO DATA FOR COPY IN BUFFER!” is displayed if there is no data in the buffer memory.
• If too much data is sent from the buffer memory, “COPY MODE BUFFER FULL!” will be displayed.
• If the data to be copied is larger than the cutting area, “CANNOT COPY CUT AREA TOO SMALL!” will be displayed. Enlarge the cutting area or load a media that can secure a sufficient cutting area.
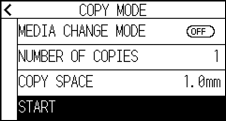
5. Press [MEDIA CHANGE MODE] to set to [OFF].
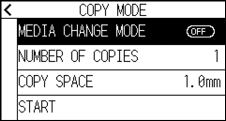
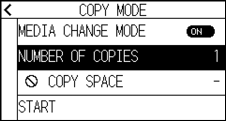
6. Press the [NUMBER OF COPIES].
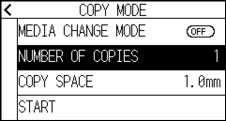
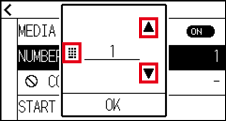
7. Specify the setting value using the [] [] icon or the [] icon.
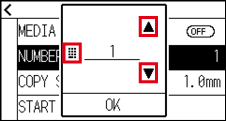
• Number of copies can be set as much as it can fit in the media set on the printer.
• The initial value for the number of copies is always 1.
8. Confirm the setting and press the [OK].
9. Press the [COPY SPACE]
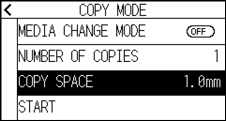
Copy interval can be set when MEDIA CHANGE MODE is turned OFF.
10. Specify the setting value using the [] [] icon or the [] icon.
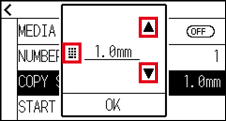
• You can set the range between 1.0 mm and 10.0 mm.
• This setting is maintained even if the power is turned off.
11. Confirm the setting and press the [OK].
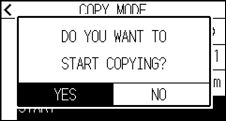
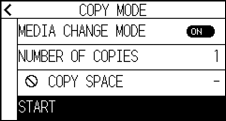
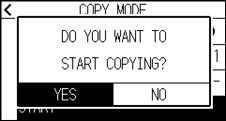
12. Press the [START].
13. Press the [YES].
The copy will start.
• Cutting data is stored even if the media is exchanged.
• It can be copied as many times until the buffer memory is cleared.
When media change mode is ON
The Change Media message appears each time when ending a single cut in Media Change mode.
Choosing to change media will instantly detect the media and proceed to a copy area.
Operation
1. Plot the data you want to copy once.
Cutting data is stored in the buffer memory.
2. Press the [] icon.
3. Press the [COPY].
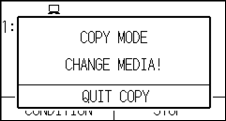
• Turning MEDIA CHANGE MODE on will display the CHANGE MEDIA message each time after a single cut.
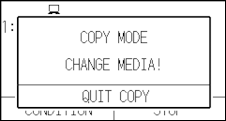
“If the [QUIT COPY] is pressed, copying will be suspended and it will return to the HOME screen.
• When exchanging media, the media selection will be chosen from what was selected before copying.
• If there is no data in the buffer memory, “NO DATA FOR COPY IN BUFFER!” will be displayed. Please send cutting data.
• If too much data is sent from the buffer memory, “COPY MODE BUFFER FULL!” will be displayed.
• If the data to be copied is larger than the cutting area, the message “CANNOT COPY CUT AREA TOO SMALL!” will be displayed. Please widen the cutting area or load a media that can secure a sufficient printing area.
4. Press the [MEDIA CHANGE MODE] to turn it to [ON].
5. Press the [NUMBER OF COPIES].
6. Specify the setting value using the [] [] icon or the [] icon.
You can set the range between 1 and 100.
7. Confirm the setting and press the [OK].
8. Press the [START].
9. Press the [YES].
The copy will start.
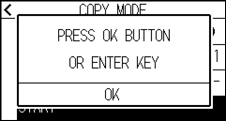
10. If the number of copies is 2 or more, replace the media after the first copy is completed.
11. Press the [OK] or [ENTER] key after replacing the media.
12. Start copying the second sheet.
Repeat this action the specified number of times.
Cutting data is stored even if the media is exchanged.
It can be copied as many times until the buffer memory is cleared.
4.3 Panel Cutting
To prevent skew of long media, utilize Panel Cutting when cutting.
• When Panel Cutting is on, the machine will begin by dividing up partition length and continue cutting until one of the following data breaks appears.
When the first partitioned area cut is finished, the machine will move to the next area, and repeat this until all areas have been cut.
• Data Breaks:
(1) No data sent for a few second after finishing cutting. (Time Out)
(2) A feed-related command is set. (GP-GL: F, FS commands, HP-GL: AF, AH, PG commands)
(3) HP-GL: SP0, NR, GP-GL: J0, SO.
(4) When commands from data breaks (2) and (3) appear, that command work will begin after the Panel Cutting is finished.
• Panel Cutting will continue for each piece of data when a data break is caused by a command, even if multiple pieces of data are sent in before the cutting finishes (even when numerous pieces of Panel Cutting data are in the plotter buffer).
• When Panel Cutting and auto media transfer are both turned on, the machine will ignore automatic media transfer length settings and continue working with priority of partition length plus something minutes ago (with footprints).
• When Panel Cutting is on, and registration marks will not be seen ignored, and copy, initial feed, and cutting area cannot be changed.
• Panel Cutting cannot be done when one file of data makes the buffer full. Make sure to always send in data lower than the buffer size.
• This setting will be saved even if the power is shut off.
Operation
1. Press the [] icon.
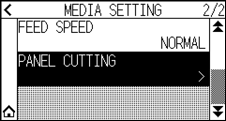
2. Press the [MEDIA].
3. Press the [] icon.
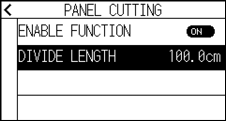
4. Press the [PANEL CUTTING].
5. Press [ENABLE FUNCTION] to turn it to [ON].
To cancel, set it to [OFF].

6. Press the [DIVIDE LENGTH].
7. Specify the setting value using the [] [] icon or the [] icon.
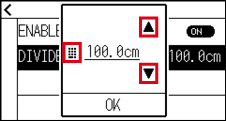
You can set the range between 1.0 cm and 2000.0 cm.
8. Confirm the setting and press the [OK].
9. Press the [ ] icon.
10. Press the [] icon.
It will return to HOME screen.