Chapter 5: ARMS
(Advanced Registration Mark Sensing System)
This chapter describes the outline of the ARMS (Advanced Registration Mark Sensing System) and how to setup and use the ARMS.
5.1 Outline of ARMS
ARMS (Advanced Registration Mark Sensing System) is a function to scan the registration mark plotted on the media using sensors.
With ARMS, tilt of the axes and distance can be adjusted with 2 POINTS or 3 POINTS. 2 axes warp adjustment can be adjusted in addition to axes adjustment (tilt) and distance adjustment with 4 POINTS.
When cutting the outlines of the printed figure, and when re-cutting media, using ARMS to adjust for printing position discrepancies, high precision cutting/plotting can be done.
It is possible to perform a multiple registration mark adjustment or segment area adjustment by linking with the application software on the computer. See the operation guides of the application software about the registration mark adjustment function linked with the application software.
Registration mark scanning accuracy when a designated registration mark is being scanned by this machine is within 0.3 mm.
Please take note of the following when scanning a registration mark.
• Shape (Pattern) of the Registration Mark and Origin Point
• Scan Range Necessary to Detect the Registration Mark
• Positioning of the Media and the Registration Mark
• Cutting area when adjusting the registration mark
• Automatic detection of registration mark position
• Media That Registration Mark Cannot be Detected
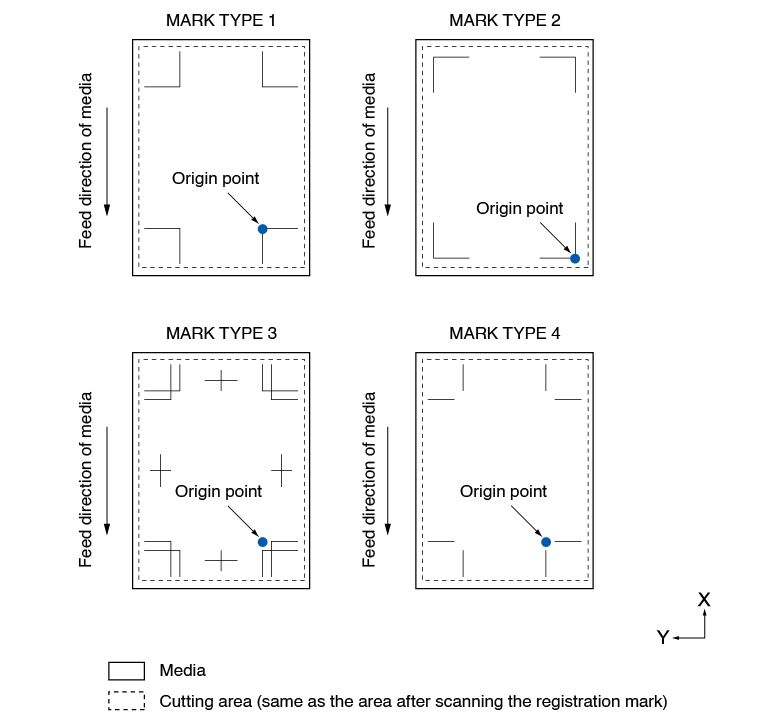
Shape (Pattern) of the Registration Mark and Origin Point
The shapes (patterns) of the registration mark the plotter can scan are following 4 types.
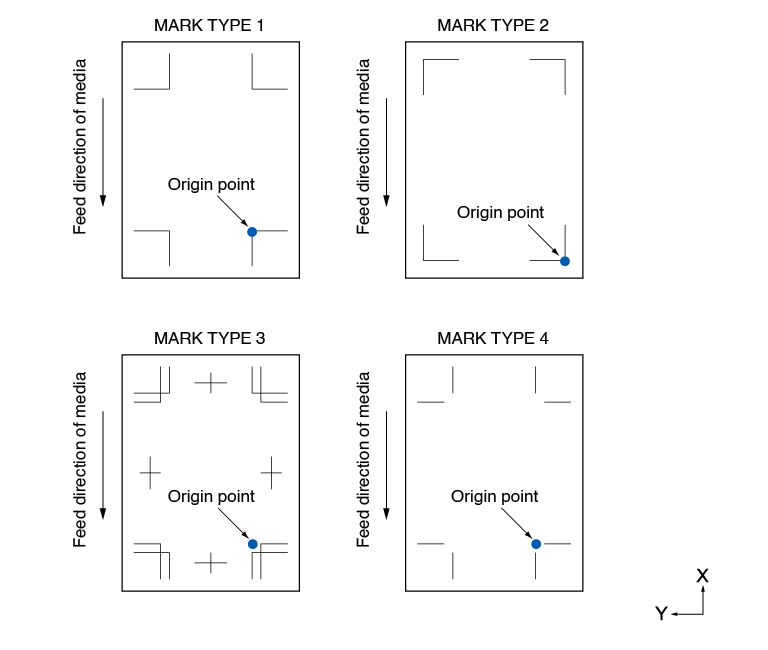

• Create the registration mark as a plotting data with the application software. Registration mark pattern 3 and 4 should be created using Adobe Illustrator.
• Create the registration mark in accordance with following conditions.
– Thickness of the line is between 0.3 to 1.0 mm.
– Size of the registration mark is between 5 to 20 mm (see “Setting Registration Mark Size”).
– Use pattern 1, pattern 2, pattern 3 or pattern 4 for the shape of the registration mark.
– Create the registration mark with single line, and specify the thickness of line to necessary thickness. Double line cannot be used.
• Panel Cutting should be switched to OFF.
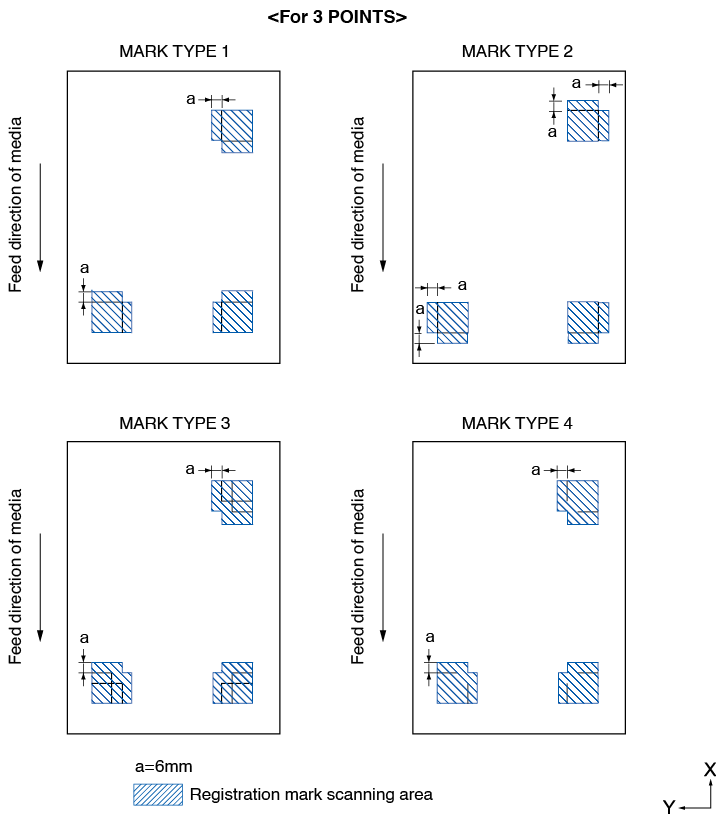
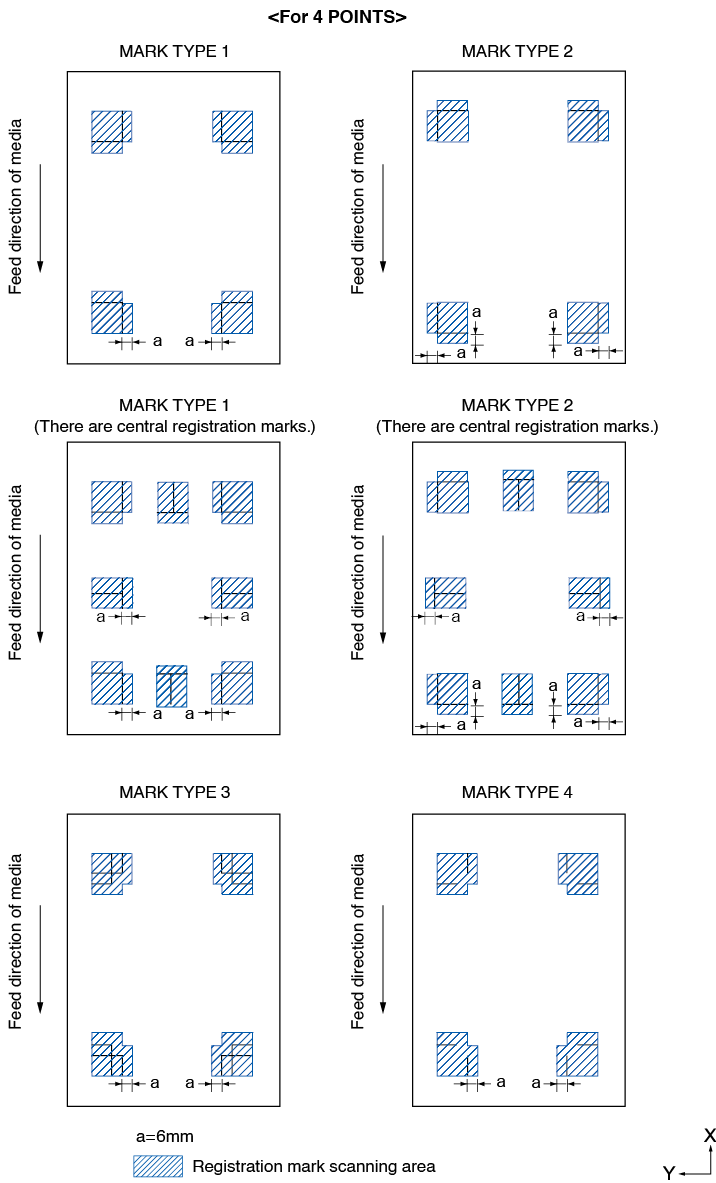
Scan Range Necessary to Detect the Registration Mark
The range of tool carriage and media movement needed to scan the registration mark is as following.
Do not print in the shaded area shown in the Figure below.
• Clean any dirt or foreign objects from the media. Any dirt or foreign object might be scanned mistakenly as registration mark.
• Plot the registration mark in contrast easy to scan, such as black lines on white background.
Set the automatic detection of registration mark position to OFF if you need to use the colored or glossy media.
(See “Set the registration mark automatic detection”)
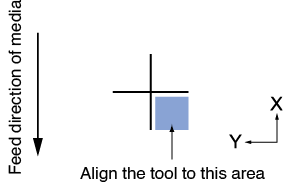
Positioning of the Media and the Registration Mark
Place the registration mark away from the edge of media to scan the registration mark.
Make sure the push roller location is outside of the registration mark.
Draw the registration mark as shown in the next image.
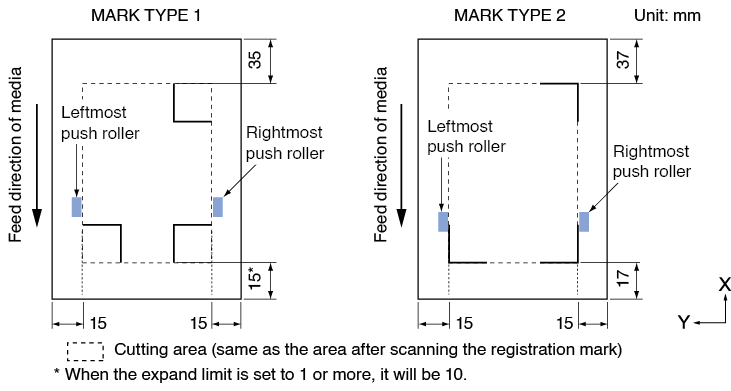
Cutting area when adjusting the registration mark
Even when the registration marks are being adjusted, you can cut the outside of the registration mark (cutting area).
Automatic detection of registration mark position
The registration mark is detected within area A from the registration mark scanning start position (tool position).
When the registration mark is not detected within the area A, then within area B is detected. Only when the registration mark is present in area A or B, it is possible to recognize as the mark.

Media That Registration Mark Cannot be Detected
It may be hard to scan the registration mark as following, depending on the media conditions.
• Transparent media
• Lines of registration marks are blurred
• Media that does not become an expected color due to the color of the background after printing
• Folded media
• Surface is dirty
• Laminated media (Depending on the type and condition of the laminate)
If you use media that does not have registration marks printed in black on white background, set the automatic detection of registration mark position to OFF. (See "Set the registration mark automatic detection")
5.2 Setting and Adjustment of ARMS
This section describes the necessary adjustment and settings to correctly scan the registration mark with ARMS.
• Automatically adjust the registration mark sensor level
• Manually adjust the registration mark sensor level
• Test the registration mark sensor
• Adjust for the registration mark scan position
• Set the registration mark automatic detection
• Set speed of the registration mark scan
Automatically adjust the registration mark sensor level
Automatically adjusts the sensor level that scans the registration marks (threshold value for distinguishing between the background color of the media and the registration mark line).
The sensor is adjusted to scan the registration mark plotted with a black line on a white background. Readjust the sensor scanning level depending on the color and gloss of the media.
If automatic adjustment is difficult due to the surface properties of the media, manually set the sensor scanning level.
Operation
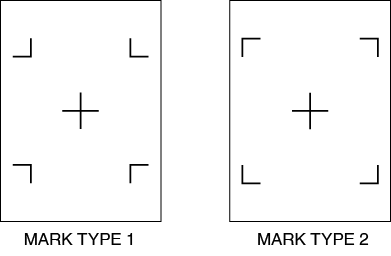
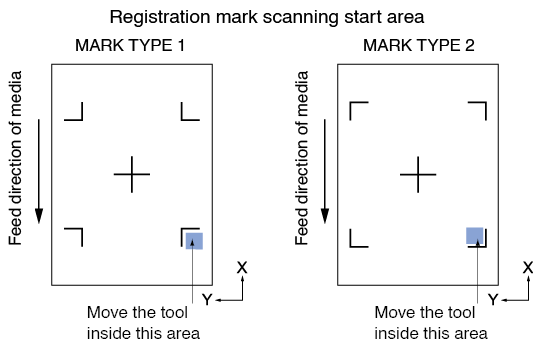
1. Print a standard registration mark pattern (MARK TYPE).
(Either MARK TYPE 1 or MARK TYPE 2 can be used.)
• For the level adjustment pattern, use the one with the registration mark color and registration mark line width plotted on the media to be used.
• Please download standard registration mark patterns from our website.
|
Registration Mark Pattern |
File Format |
File Name |
|
MARK TYPE 1 |
|
ARMStest_type1.pdf |
|
eps |
ARMStest_type1.eps |
|
|
MARK TYPE 2 |
|
ARMStest_type2.pdf |
|
eps |
ARMStest_type2.eps |
2. Load the printed media on the plotter.
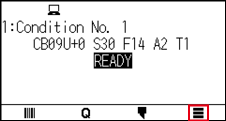
3. Press the [ ] icon.
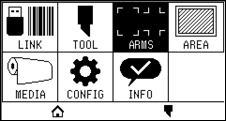
4. Press the [ARMS].
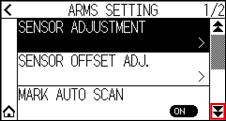
5. Press the [SENSOR ADJUSTMENT].
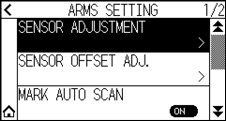
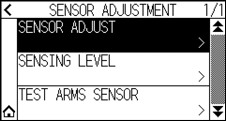
6. Press the [SENSOR ADJUST].
7. Press the [SCAN].
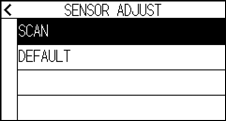
Press the [DEFAULT] to set the sensor level to the initial value.
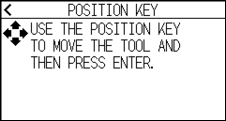
8. Press the POSITION ( ,
,  ,
,  ,
,  ) keys to move the tool to the scanning start position.
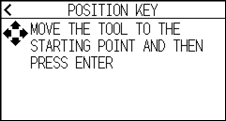
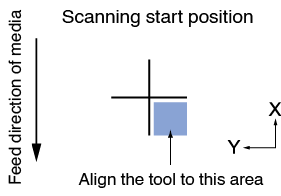
9. Confirm the position of the tool and press the [ENTER] key.
 The cross will be scanned and the scanning level will be adjusted.
• If the cross cannot be scanned, an error message will be displayed.
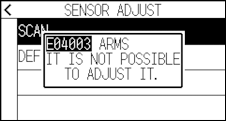
• Depending on the condition of the media, it may not be possible to scan it properly even after adjustment.
If the detection operation does not complete normally, please See “6.2 Manual Position Adjust”.
10. Press the [ ] icon.
11. Press the [ ] icon.
It will return to HOME screen.
Manually adjust the registration mark sensor level
Manually set the level of the sensor that scan the registration marks (threshold value that distinguishes between the background color of the media and the registration mark line).
The sensor is adjusted to scan the registration mark plotted with a black line on a white background. Adjust the sensor scanning level depending on the color and gloss of the media.
Operation
1. Press the [] icon.
2. Press the [ARMS].
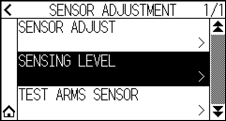
3. Press the [SENSOR ADJUSTMENT].
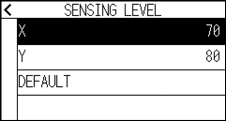
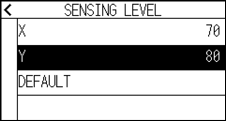
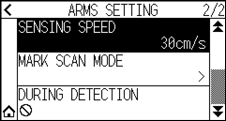
4. Press the [SENSING LEVEL].
• For the sensing level, specify what percentage of the signal level difference between the background color of the media and the registration mark is to be set as the threshold.
• Set the level for sensing registration mark while moving in the X direction (feed direction of media) for X, and the sensing level for sensing registration mark while moving in the Y direction (tool carriage movement direction) for Y.
• In the following cases, register marks may be scanned by increasing the value.
– When the color of the media and the color of the register mark are similar.
– When the registration mark passes past the position.
• In the following cases, register marks may be scanned by decreasing the value.
– When a position with no registration mark is scanned.
– When folds or dirt on the media surface is scanned.
5. Press the [X].
6. Specify the setting value using the [] [ ] icon or the [
 ] icon.
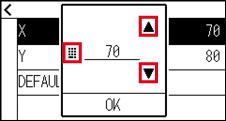
You can set the range between 30 and 90.
7. Confirm the setting and press the [OK].
8. Press the [Y].
9. Specify the setting value using the [] [] icon or the [] icon.
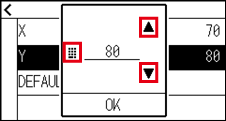
You can set the range between 30 and 90.
10. Confirm the setting and press the [OK].
11. Press the [] icon.
12. Press the [] icon.
It will return to HOME screen.
Test the registration mark sensor
If there still is a difference in the cutting/plotting, even after performing an adjustment using the registration mark, it is possible to check if there is a problem with the registration mark itself or the application by checking the position of the registration mark plotted.
Operation
1. Print the standard registration mark.
(Either MARK TYPE 1 or MARK TYPE 2 can be used.)
• If you want to test the MARK SCAN MODE 1, print “Test Pattern 1”, and if you want to test the MARK SCAN MODE 2, print “Test Pattern 2”.
• Please download standard registration mark patterns from our website.
|
Registration Mark Pattern |
File Format |
File Name |
|
MARK TYPE 1 |
|
ARMStest_type1.pdf |
|
eps |
ARMStest_type1.eps |
|
|
MARK TYPE 2 |
|
ARMStest_type2.pdf |
|
eps |
ARMStest_type2.eps |
2. Load the printed media on the plotter.
3. Press the [] icon.
4. Press the [ARMS].
5. Press the [SENSOR ADJUSTMENT].
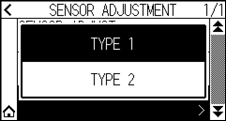
6. Press the [TEST ARMS SENSOR].

7. Press the type of registration mark you want to use.
8. Press the POSITION (, , , ) key to move the tool to the registration mark scanning start area.
9. Confirm the position of the tool and press the [ENTER] key.
The plotter will automatically detect the registration mark and cut the cross.

With this function, cutting is performed after sensing the register mark pattern.
If you use a cutter as a tool, be careful not to damage the plotter.
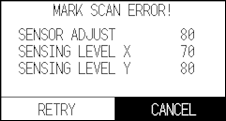
Following error is displayed when the registration mark was not scanned properly.
Press the [RETRY] to scan again, or the [CANCEL] to exit.
10. Confirm the cutting result.
See "Adjust for the registration mark scan position" and adjust if the cutting position is shifted.
See " Automatically adjust the registration mark sensor level" above and make adjustments if you are unable to scan the registration marks.
Adjust for the registration mark scan position
Sensor to scan the registration mark is positioned away from the tip of the tool. Therefore, it is necessary to adjust the coordinate values of the scanned registration mark so it will match with the plotting position.
If the registration mark is already marked on the media, scan that registration mark, plot another registration mark in the same position, and measure the difference between them. This difference is entered as an adjustment value.
If there is no registration mark on the media, plot a registration mark first, scan that registration mark, plot another registration mark, and measure the difference of them. This difference is entered as an adjustment value.
When using media and tools for actual use, the adjustment accuracy will be higher.
Adjust after plotting the correction registration mark
This section describes the procedure to adjust the registration mark scan position if there is no registration mark on the media.
See “Adjust using plotted adjustment registration mark” if there is registration mark on the media.
Operation
1. Load white media into the plotter.
2. Set the water-based fiber pen (black) on the backward of tool holder.
• Check If the Water-based fiber-tip pen has been scratched.
• Water-based fiber pen is an optional item.
3. Press the [] icon.
4. Press the [ARMS].
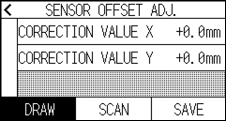
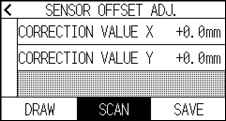
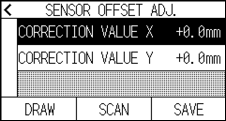
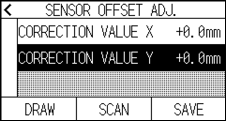
5. Press the [SENSOR OFFSET ADJ.].

6. Press the [DRAW].
7. Press the POSITION (, , , ) keys and move the tool to the position to create the registration mark (position nothing is printed)
8. Press the [ENTER] key.
An adjustment registration mark is created, and then it will return to the SENSOR OFFSET ADJ. screen.
9. Press the [SCAN].
10. Press the POSITION (, , , ) keys to move the tool to the scanning start position.
11. Check the position of the tool and press the [ENTER] key.
After scanning the registration marks, plot the registration marks for comparison. When plotting is completed, it will return to the SENSOR OFFSET ADJ. screen.
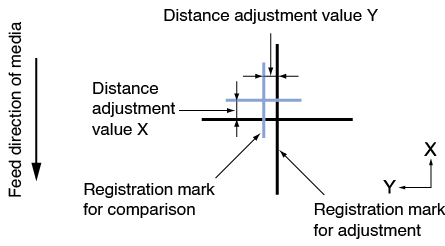
12. Using the registration mark plotted in step 8, measure the distance of how much the adjustment registration mark needs to be moved so both will overlap, and record the value. As an example, in the figure in step 11, it needs to move in negative directions for both X and Y directions, so both of the adjustment values will be negative values.
Position of the registration mark is measured at the center of the line.
13. Press the [CORRECTION VALUE X].
14. Specify the setting value using the [] [] icon or the [] icon.
Enter the value of X measured in step 12.
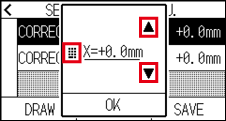
You can set the range between -3.0 mm and +3.0 mm.
15. Confirm the setting and press the [OK].
16. Press the [CORRECTION VALUE Y].
17. Specify the setting value using the [] [] icon or the [] icon.
Enter the value of Y measured in step 12.
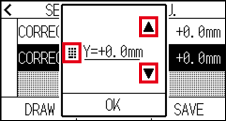
You can set the range between -3.0 mm and +3.0 mm.
18. Confirm the setting and press the [OK].
19. Press the [SAVE].
20. Press the [] icon.
It will return to HOME screen.
Adjust using plotted adjustment registration mark
This section explains the procedure when the registration marks required to adjust the registration mark scanning position is already plotted on the media.
See “Adjust after plotting the correction registration mark” if there is no registration mark.
Operation
1. Load the media with registration marks for adjustment.
2. Press the [] icon.
3. Press the [ARMS].
4. Press the [SENSOR OFFSET ADJ.].
5. Press the [SCAN].
6. Press the POSITION (, , , ) keys to move the tool to the scanning start position.
7. Check the position of the tool and press the [ENTER] key.
After scanning the registration marks, plot the registration marks for comparison. When plotting is completed, it will return to the SENSOR OFFSET ADJ. screen.
8. Based on the scanned registration mark for adjustment, measure the distance of how much the adjustment registration mark needs to be moved so both will overlap, and record the value. As an example, in the figure in step 7, it needs to move in negative directions for both X and Y directions, so both of the adjustment values will be negative values.
Position of the registration mark is measured at the center of the line.
9. Press the [CORRECTION VALUE X].
10. Specify the setting value using the [] [] icon or the [] icon.
Enter the value of X measured in step 7.
You can set the range between -3.0 mm and +3.0 mm.
11. Confirm the setting and press the [OK].
12. Press the [CORRECTION VALUE Y].
13. Specify the setting value using the [] [] icon or the [] icon.
Enter the value of Y measured in step 7.
You can set the range between -3.0 mm and +3.0 mm.
14. Confirm the setting and press the [OK].
15. Press the [SAVE].
16. Press the [] icon.
It will return to HOME screen.
Set the registration mark automatic detection
When setting the registration mark automatic detection to on, if the current position of the tool is close to the position of the first registration mark (Point 1) at the time of registration mark automatic detection, the registration mark is automatically scanned without moving to the scanning start position of tool. f set to OFF, this operation will not be performed.
If the current position of the tool is distanced from the first registration mark, detection may take a long time, and errors due to not finding anything may occur.
Operation
1. Press the [] icon
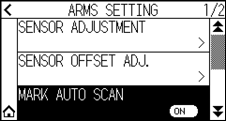
2. Press the [ARMS].
3. Press [MARK AUTO SCAN] to turn it to [ON].
To cancel, set it to [OFF].
4. Press the [] icon.
It will return to HOME screen.
Set speed of the registration mark scan
Speed of the tool carriage and media to scan the registration mark is set.
It may not scan the registration marks or the difference may become large when the speed is too high, but the scanning time becomes longer when the speed is too slow. Adjust the setting value considering the balance.
If the registration mark cannot be scanned or the error is large, setting a low (slower) value may improve the scanning.
Operation
1. Press the [] icon.
2. Press the [ARMS].
3. Press the [ ] icon.
4. Press the [SENSING SPEED].
5. Specify the setting value using the [] [] icon or the [] icon.
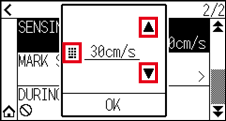
You can set the range between 1 cm/s and 30 cm/s.
6. Confirm the setting and press the [OK].
7. Press the [] icon.
It will return to HOME screen.